Understanding the Basics of Double Barn Doors
Double barn doors are popular for functional and stylish room dividers or entrances. This section will briefly discuss the benefits of using double barn doors.
Benefits of Using Double Barn Doors
Double barn doors offer a variety of advantages, both in terms of function and style:
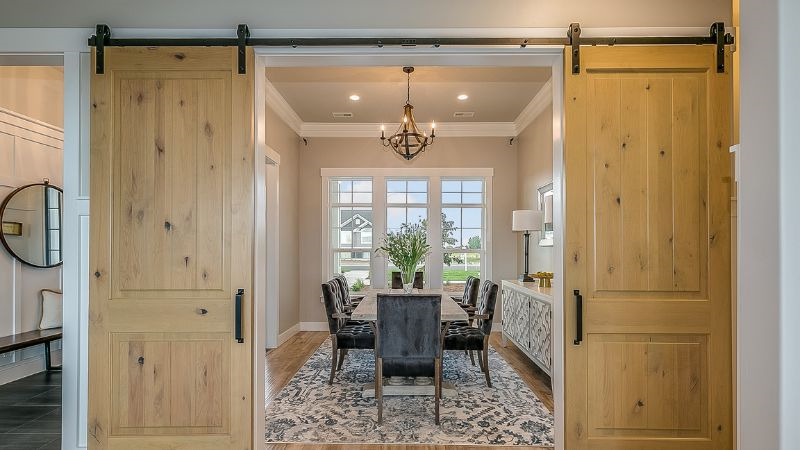
- Space-saving: Double barn doors slide along tracks installed above the door frame, taking up minimal floor space and making them ideal for tight spaces or rooms with heavy foot traffic.
- Versatility: You can use double barn doors as room dividers, closet doors, or entranceways, giving you a lot of flexibility in your interior design.
- Customization: Barn doors are available in a wide range of materials, colors, and styles, allowing you to select a design that fits your home’s aesthetic perfectly.
- Ease of installation: While installing double barn doors requires some skill, it’s generally a straightforward process that can be undertaken by homeowners with basic DIY knowledge.
Required Tools and Materials for Installation
Before you begin, gather the necessary tools and materials for installing your double barn doors. This will make the process hassle-free and more efficient.
To start, you’ll need a cordless drill, driver bits, a miter saw, a step ladder, and a tape measure. A pencil, wood glue, wood filler, clamps, and a combination square will help you ensure accuracy during installation. Using a laser level and a stud finder will make locating studs easier and ensure proper track and hardware placement.
To properly install the doors, you will need barn door hardware kits which typically include a track, rollers, stoppers, lag bolts, and wood screws. Make sure to choose a kit that accommodates double barn doors and fits your intended door size. Double-check that the kit comes with the right accessories like hanger straps, hardware connectors, and any additional brackets or spacers you may need.
The doors themselves should be made of sturdy, durable materials like solid wood, natural wood, MDF, or plywood. You can select from various styles, from rustic to contemporary, to best match your home’s aesthetic. When selecting your doors, be mindful of the dimensions of the opening and ensure that there is enough overhang for proper coverage and smooth operation.
You will also need lumber to build a backer board if your walls don’t have one in place for the track installation. The backer board will provide additional support and stability for your double barn doors. To finish off the installation, you will need to finish the nailer, handles, and paint or stain to give your doors the desired appearance.
Pre-Installation Considerations
In this section, we’ll go through some crucial pre-installation aspects that you must remember.
Space and Door Opening: First, think about the available space around the door opening. Double barn doors require ample empty wall space on both sides of the doorway so that they can slide open completely. Measure the width and length of your doorway, including any trim, and add 2-4 inches to your width measurement for proper coverage. For length, you’ll need to factor in 1/2 inch of clearance above the floor.
Height and Clearance: A sliding barn door should be tall enough so that there is about a 1/2-inch of space between the bottom of the door and the floor when it’s hung on the metal track. It should also be wide enough to completely cover the entryway with an inch or two of overhang on both sides and about one inch at the top.
Temperature and Humidity: Since temperature and humidity can affect the materials you’re working with, be mindful of the conditions in your home. Wood in particular is prone to expanding and contracting due to temperature differences and humidity levels, which could impact the performance of your finished doors.
Wall Space and Trim Limits: Examine the wall space and trim around your door opening, ensuring that you have enough room for the installation. If there are any obstacles or limits, you may need to adjust your plans or find a workaround to accommodate the double barn doors.
Measurements and Markings
Before you start installing your double barn doors, it’s crucial to take accurate measurements and make the necessary markings. It’s a good idea to have a pencil, measuring tape, a laser level, and some masking tape handy for this process.
First, measure the height and width of the opening where you plan to install your double barn doors. Make sure to add at least a half-inch to the height measurement, as this will be needed for the floor guide. Also, ensure that the header above the opening is adequate for the barn door hardware you have chosen.
Using your measuring tape, determine the height at which the door track should be mounted. Generally, this will be the door height plus a half-inch for the floor guide, and an additional 2-3 inches for the clearance above the door. Mark this height on the wall using a pencil and masking tape.
Now it’s time to find the center of the opening. Measure the width of the opening and divide by two. Mark this center point on the wall with a pencil, as this will be the reference point to align the two doors when hanging them.
Next, set up your laser level at the previously marked height to project a straight, horizontal line across the entire width of the opening. This will be the reference line for mounting your door track. It’s essential to get this line perfectly level, as even a slight angle could result in the doors not hanging correctly or sliding smoothly.
Once you have completed these measurements and markings, you’re ready to move on to the next steps in the installation process. Just remember to take your time and double-check your work to ensure you have a successful installation.
Preparing the Door Opening
First, locate the wall studs by using a stud finder. This handy tool will help you identify where the studs are behind your drywall. Place the stud finder on the wall and move it horizontally until you see the indicator light up or beep, which means you’ve found a stud. Mark these spots for future reference.
Once you’ve found the studs, assess if you have a header or support beam in place at the top of the opening. A header is a horizontal beam that transfers weight to the wall’s vertical studs. If your door opening already has a header, great! If not, you’ll need to install one to support the weight of your double barn doors. Make sure it’s level before securing it into the wall studs.
Next, check if the floor is level. If not, you might need to make some adjustments to ensure your double barn doors will hang and move smoothly. Use a level to help determine if adjustments are needed. If the floor is not level, consider using shims or door guides designed for uneven floors.
Now that your header and floor are sorted, it’s time to remove any existing trim around the door opening. Carefully use a pry bar to detach the trim from the walls, being mindful not to damage the surrounding drywall. With the trim removed, you can now measure the height and width of the opening to confirm the size of your double barn doors.
Preparing the Barn Doors
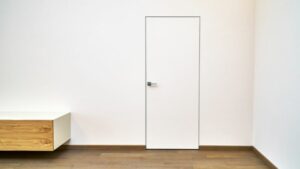
Before starting your DIY project of installing double barn doors, it’s essential to prepare the doors themselves. Begin by selecting a suitable style of barn doors for your space. This can be a traditional wooden door or a more modern and industrial style, depending on your personal preference and the overall décor of your space.
Once you have chosen the style, it’s time to build the doors or purchase pre-made ones, ensuring that they are the correct size for your door opening. Measure the opening accurately to avoid any issues later on when installing the hardware. Remember to leave some allowance for the necessary gaps and clearance.
After obtaining the doors, you might want to paint or stain them to match your interior design. In this case, it is best to apply the finish before installing the hardware. Choose a paint or stain compatible with the material of the doors, paying close attention to the manufacturer’s guidelines for application and drying times.
While the paint or stain is drying, gather all the necessary tools and hardware required for the installation. This typically includes a drill, screws, a level, a measuring tape, and the installation hardware that comes with the doors. Lay out your tools and have them ready for the next step, the installation process, making sure to follow any specific instructions provided by the manufacturer.
During this preparation stage, it’s also a good idea to familiarize yourself with the assembly process of the hardware, as well as any additional components you need to install for the double barn doors to function correctly, such as anti-jump brackets or stops.
By preparing your barn doors appropriately, you’re setting yourself up for success in your DIY project, ensuring that the installation process goes smoothly and results in a beautiful, functional addition to your space.
Installing the Track and Hardware
First, you’ll want to gather all the necessary materials and tools, such as your barn door hardware, rollers, screws, wood screws, level, drill, laser level, and the metal track. Once you have everything ready, follow these steps:
- Find the wall studs: Use a stud finder to locate and mark the wall studs where you’ll be installing the track. This is important as you’ll need to secure the track to the wall studs for added stability.
- Measure and cut the track: Measure the width of the barn doors and add at least two inches on each side. Use this measurement to cut your track to the appropriate length.
- Attach the mounting board: If you’re using a mounting board, secure it to the wall studs with wood screws to create a strong and stable base for your track.
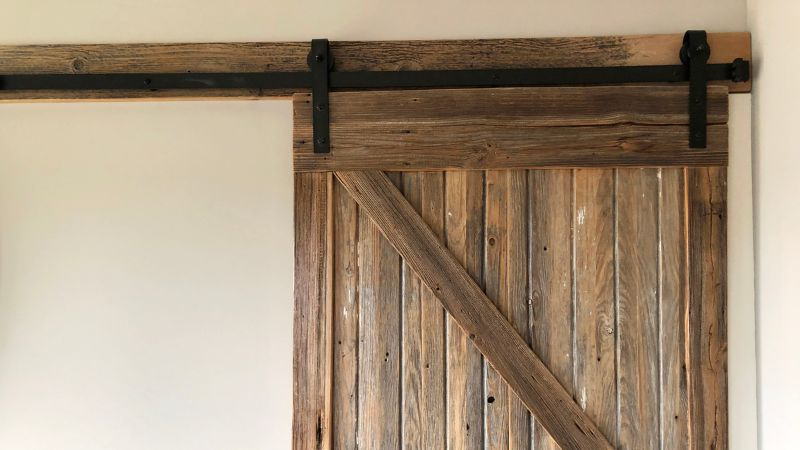
- Install the track: With the help of a level or laser level, position the track above the door opening at the desired height and mark the screw holes. Drill pilot holes into the marked spots and attach the track to the wall or mounting board using wood screws or wall anchors.
- Insert the rollers: Before hanging the doors, install the rollers onto the top edge of each door according to your barn door hardware kit’s instructions. Make sure the rollers are securely attached and move smoothly on the track.
- Attach the door stops: To prevent the doors from sliding off the track, install door stops at both ends of the track. This can typically be done by sliding them onto the track and tightening the set screws.
- Hang your barn doors: Carefully lift the doors and place the rollers onto the track. Ensure both doors glide smoothly and are aligned properly. Afterward, attach any final hardware, such as floor guides or handles, according to your kit’s instructions.
Setting Up the Double Barn Doors
First, you’ll need to measure the space where your double barn doors will be installed. Make sure the doors are at least two inches wider than the door opening to ensure they fit properly. Once you have the right-sized doors, gather all the necessary hardware, including the track, rollers, level, trim, clamps, and a miter saw if needed. Be prepared with a pocket door kit as well, in case you need to modify any existing door frames.
Before starting the installation, double-check the level of your floor and adjust the doors accordingly. You want to make sure that the doors move smoothly throughout their range, so that both doors overlap slightly in the middle when closed.
Next, move on to preparing the hardware. Assemble the rollers by connecting them to the door, ensuring they are secure and correctly lined up with the track. If necessary, trim any excess parts of the track using a miter saw to accommodate the width of your doors.
Now it’s time to install the track. To do this, clamp the track to the wall while using a level to ensure it is straight. Once you are satisfied with the position of the track, fix it in place by drilling holes into the wall and securing it with appropriate fasteners. Be mindful of any overhang that may occur due to the dimensions of your doors.
With the track in place, gently slide the doors onto it, allowing the rollers to guide them along the new path. Be cautious with the doors in this step, as you don’t want to scratch or damage their surfaces.
Finishing Touches for the Barn Doors
Once you have installed the double barn doors, it’s time to focus on the finishing touches. In this section, you will learn how to add hardware, handles, locks, and ensure the doors are level. We’ll also cover maintenance tips to keep your barn doors looking great.
First, inspect the doors and make sure they’re level. Use a level tool and make pencil marks where adjustments need to be made. Having even and properly hung doors is essential for their smooth operation.
Next, you’ll want to assemble and install the door hardware. Your hardware should include overhang brackets, stoppers, anti-jump disks, and any other necessary components. Follow the manufacturer’s instructions for proper installation.
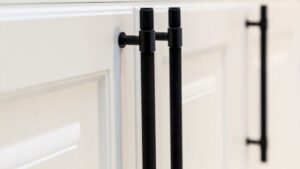
Now, it’s time to add the door handles. Choose handles that match your door’s style and finish, and make sure they are comfortable to grip. Use a pencil to mark the location where you want to install the handle, then drill holes and attach the handles using the provided screws.
If you want your doors to lock, now is the time to install locks. There are various types of locks available, such as hook locks or sliding door locks. Pick the one that suits your needs and attach it according to the manufacturer’s instructions.
To give your barn doors a polished appearance, use wood filler to fill any nail holes or imperfections on the wood surface. Following that, sand the doors to achieve a smooth and even surface. Now, you’re ready to paint or stain the doors, depending on your preference. Make sure to use an appropriate paint or stain that is suitable for your doors’ material and follow the application instructions.
Lastly, let’s talk about maintaining your barn doors. Regularly check the hardware to ensure it is secure and functioning correctly. Keep the doors clean and free of dust and debris by wiping them down occasionally. If you notice any wear or damage on the doors, perform the necessary repairs or touch-up paint as required.
Frequently Asked Questions
What is the best hardware for double barn doors?
When choosing hardware for your double barn doors, make sure to opt for high-quality materials and components. Consider choosing a sliding door track kit made from durable materials such as stainless steel or solid aluminum. Additionally, pick rollers with sealed bearings for a smooth glide and longevity. Further, ensure the brackets and handles complement the look of your barn doors and suit your style preferences.
How do I align two barn doors to meet in the middle?
To ensure the perfect alignment of your double barn doors, it is crucial to install the hardware level and at the same height on both doors. Use a level and measuring tape to verify the position of the track and rollers. Once installed, check the gap between the doors for evenness when they are both closed. You may need to make minor adjustments to the hardware or add door stops to achieve the desired alignment.
What measurements are needed for proper double-door installation?
Accurate measurements are vital for the proper installation of double barn doors. Start by measuring the width and height of the doorway. Then, double the width measurement to determine the proper size of each door, ensuring it covers at least half the size of the opening when closed. Don’t forget to account for additional space needed for hardware installation, including the track length and the necessary clearance for door movement.
Are there easy step-by-step instructions for hanging double barn doors?
Numerous comprehensive guides and tutorials are available online for hanging double barn doors, including step-by-step videos and articles. You can find instructions on reputable websites like The Home Depot and YouTube that cover the entire installation process.
How can I adjust double barn doors for a smooth opening and closing?
To ensure the smooth operation of your double barn doors, regularly inspect the track and rollers for debris or damage. Clean and lubricate the moving parts if necessary. Additionally, verify that the doors are hanging level, adjusting the hardware as needed. If you notice any misalignment or friction, examine the installation for any necessary adjustments, such as repositioning the track or adding door stops.