
If you’re planning to install a sliding barn door, one of the first questions you’ll face is: what is the rough opening for a barn door?
The rough opening is the framed wall space where your barn door will be installed, measured before any trim, jamb, or hardware is added. Knowing the exact dimensions required is the foundation of a successful barn door installation — and it’s simpler than most people think once you understand the basic rules.
In this complete guide, you’ll learn how to measure your rough opening correctly, choose the right barn door and track size, prepare your wall for installation, and finish the job like a pro — whether you’re a seasoned DIYer or a first-time installer.
Înțelegerea golurilor de montaj pentru ușile de hambar
La instalarea unei uși de hambar, golul de montaj este o dimensiune esențială pentru a te asigura că ușa se potrivește și funcționează corect.
Ce este golul de montaj pentru o ușă de hambar? (Și de ce contează)
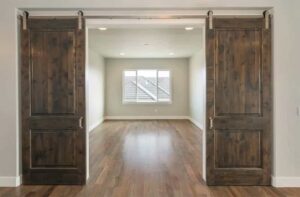
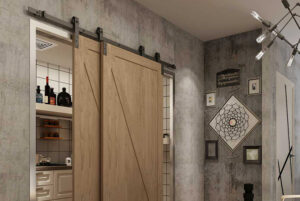
A barn door rough opening is the unfinished, framed wall space that your barn door is designed to cover. Unlike a traditional door that sits within the opening, a barn door slides in front of the wall on an exterior-mounted track. This means the door itself needs to be larger than the opening to provide adequate privacy, light blocking, and visual coverage.
Getting the rough opening measurement right matters for two key reasons:
- Too small a door: Light gaps and privacy issues will make the installation look and function poorly.
- Too large a door: The door becomes unnecessarily heavy and may overload the track hardware.
The rough opening measurement is always taken from the raw framing — the exposed wood studs — before any drywall, trim, or molding is applied. Width and height are your two primary dimensions.
The Basic Rough Opening Formula:
- Door Width = Rough Opening Width + 4 to 6 inches (2 to 3 inches of overlap per side)
- Door Height = Rough Opening Height + 1 inch (for hardware clearance and floor gap)
Cum se măsoară golul de montaj pentru o ușă de hambar
Accurate measurements are everything when it comes to barn door sizing. Follow these steps carefully before purchasing any hardware or a door slab.
Pasul 1: Măsoară lățimea
Using a tape measure, measure the horizontal width of your door opening at its widest point — typically at the center of the opening. Record this number. This is your base rough opening width.
To determine the correct barn door width, add 4 to 6 inches to the rough opening width (2 to 3 inches of overlap on each side). This overlap is critical for blocking light and ensuring privacy.
Example: If your rough opening is 36 inches wide, your barn door should be 40 to 42 inches wide.
Pasul 2: Măsoară înălțimea
Measure from the finished floor up to the top of the door opening. This gives you your rough opening height. Add approximately 1 inch to this figure to account for hardware fittings and to ensure a proper gap above the floor.
Example: If your rough opening height is 80 inches, your barn door should be approximately 81 to 82 inches tall.
Pasul 3: Verifică distanța față de podea
The bottom of the barn door should sit approximately ½ inch above the finished floor. This gap prevents the door from dragging, scraping, or catching on floor irregularities — particularly important on uneven or textured flooring like tile or hardwood.
Tabel cu dimensiunile golurilor de montaj pentru ușile de hambar
Use the chart below as a starting point for choosing a barn door size for your opening.
|
Rough Opening Width
|
Recommended Door Width
|
Rough Opening Height
|
Recommended Door Height
|
Min. Track Length
|
|---|---|---|---|---|
|
24 inches
|
28–30 inches
|
80 inches
|
81–82 inches
|
56–60 inches
|
|
30 inches
|
34–36 inches
|
80 inches
|
81–82 inches
|
68–72 inches
|
|
36 inches
|
40–42 inches
|
80 inches
|
81–82 inches
|
80–84 inches
|
|
42 inches
|
46–48 inches
|
84 inches
|
85–86 inches
|
92–96 inches
|
|
48 inches
|
52–54 inches
|
84 inches
|
85–86 inches
|
104–108 inches
|
|
60 inches
|
64–66 inches
|
96 inches
|
97–98 inches
|
128–132 inches
|
For help measuring your opening, trim, and available wall space, see our step-by-step barn door measuring guide.
Cum alegi dimensiunea potrivită a ușii de hambar și sistemul de șine
Once you have your rough opening measurements in hand, the next step is selecting a barn door and track system that work together seamlessly.
Alegerea dimensiunii potrivite a ușii de hambar
Your barn door must be large enough to fully cover the rough opening with overlap on all sides. Use the sizing chart above as your starting point, then cross-reference with the specific door you’re purchasing. Pay close attention to:
- Width Overlap: 2 to 3 inches beyond the opening on each side — non-negotiable for privacy and light blocking.
- Height Clearance: The door should sit ½ inch above the floor when hung, with 1 inch of added height above the rough opening factored into your door selection.
- Door Material & Weight: Solid wood barn doors are heavier and require higher-rated track hardware. Hollow-core or MDF doors are lighter and more forgiving on standard hardware kits.
Alegerea sistemului de șine potrivit
The track is what your barn door hangs and slides from, making it one of the most critical components of the entire system. Here’s what to know:
- Track Length: The track must be at least twice the width of your barn door to allow the door to slide completely clear of the opening. A 42-inch door requires a minimum 84-inch track.
- Weight Rating: Every track system has a maximum weight capacity. Always verify the track’s weight rating exceeds the actual weight of your door slab — ideally with a comfortable margin.
- Track Hardware Kits: Most reputable suppliers sell complete barn door hardware kits that include the track, rollers, spacers, mounting bolts, floor guide, and door stops. Buying a kit ensures all components are compatible.
- Roller Style: Flat-track rollers, v-groove rollers, and J-bar rollers each suit different door and wall configurations. Check your wall type and door edge profile before choosing.
Tip: If you’re installing near an outlet, light switch, or window, always map your track position first. A track that’s even slightly misaligned can cause long-term operational issues and hardware strain.
Pregătirea pentru instalare
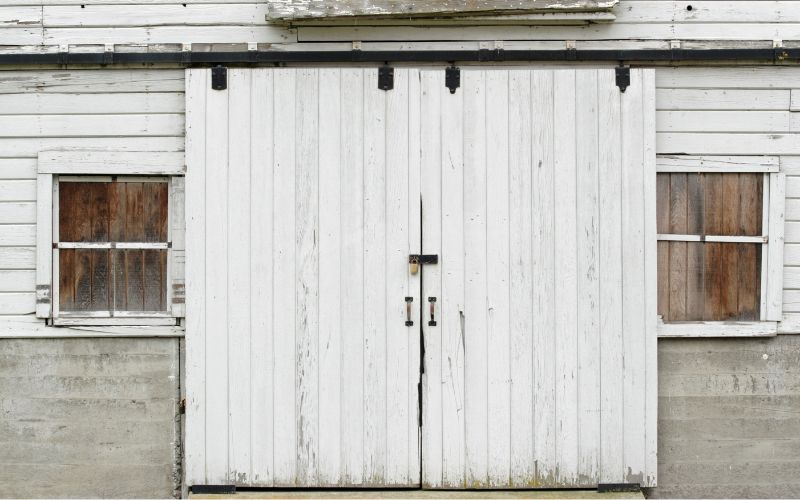
Pregătirea temeinică înainte de montarea feroneriei face diferența dintre o instalare cu aspect profesional și una frustrantă. Evaluează-ți peretele și rezolvă orice obstacol înainte să începi să dai găuri.
Assessing Wall Space and Stud Locations
Pentru rezistență structurală și siguranță, șinele ușilor de hambar trebuie fixate în montanții peretelui. O ușă care nu este ancorată corespunzător se poate desprinde de perete sub sarcină — mai ales dacă este o foaie masivă din lemn, mai grea.
Spațiul minim necesar pe perete:
Spațiul necesar pe perete = lățimea ușii × 2
Așadar, o ușă de hambar de 42 de inci necesită cel puțin 84 de inci de spațiu liber pe perete, fără obstacole de-a lungul liniei șinei.
Folosește următoarele unelte pentru a evalua corect peretele:
- Stud Finder: Locate and mark all studs along your planned track line.
- Level: Ensure the track will be perfectly horizontal before drilling.
- Tape Measure: Confirm wall width, clearance from the ceiling, and any obstacle positions.
De asemenea, ai nevoie de cel puțin 6 inci de spațiu liber deasupra tocului ușii pentru montarea consolei șinei și a rolelor. Dacă tavanul este mai jos sau există o cornișă decorativă în cale, va trebui să instalezi o grindă de susținere.
Dealing with Molding, Trim, and Obstacles
Perdelele decorative ale ușii, cornișele, prizele electrice, întrerupătoarele și tocurile existente pot împiedica instalarea șinei ușii de hambar. Iată cum poți rezolva cele mai frecvente probleme:
- Door Trim & Molding: Measure the exact depth that the molding protrudes from the wall. Install a header board (typically 1×6 or 1×8 lumber) of matching or greater thickness to create a flush mounting surface for the track.
- Existing Door Jamb: Remove the door from its hinges and strip any existing hardware — hinges, strike plates, and handles — before beginning installation.
- Electrical Outlets or Switches: If an outlet or switch falls within the track path, consult a licensed electrician about relocating it before proceeding. Never mount track hardware over an active electrical box.
- No Studs Aligned with Track: Use heavy-duty wall anchors rated for the weight of your door when studs aren’t available at required mounting points. A header board spanning between two studs can also distribute the load effectively.
Montarea șinei și retușurile finale
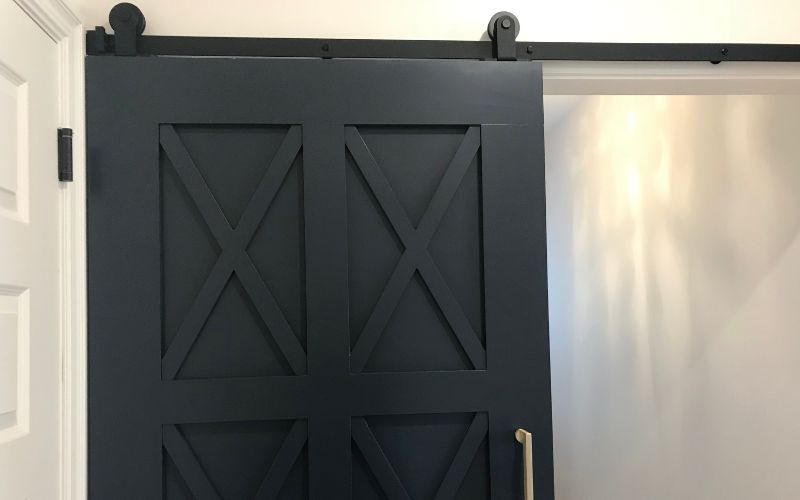
With your wall prepped and all measurements confirmed, you’re ready to install. Follow these steps in order for a smooth, professional result.
Pas cu pas: instalarea șinei pentru ușa de hambar
- Mark your track position. Using a level, draw a horizontal guideline above the door opening where the track will be mounted. The bottom of the track should sit high enough for the door to clear the floor by ½ inch when hung.
- Locate and mark your drill points. Identify stud locations along the guideline and mark each mounting hole. Where no studs are present, mark anchor positions.
- Drill pilot holes. Use the appropriate drill bit for your wall material (wood stud, drywall anchor, or masonry) to pre-drill each marked position.
- Mount the track. Align the track with your pilot holes and fasten securely using the bolts and spacers included in your hardware kit. Use a level to confirm the track is perfectly horizontal before fully tightening.
- Hang the door. Attach the roller brackets to the top of the door slab, then lift the door and hook the rollers onto the track. Have an assistant help — barn doors are heavier than they appear.
- Install the floor guide. Attach a floor guide at the base of the door opening to keep the bottom of the door stable and prevent it from swinging away from the wall.
- Add door stops. Fix door stops at both ends of the track to prevent the door from sliding off the end or slamming into the wall.
- Attach the handle. Mount the door pull handle at a comfortable height, typically between 36 and 42 inches from the floor.
Reglarea și testarea ușii
Once the door is hung, slide it back and forth several times to test operation. Check for the following:
- Floor gap: Confirm the ½-inch clearance between the door bottom and the floor along the full travel path.
- Wall clearance: Ensure the door glides parallel to the wall without scraping or tilting.
- Smooth rolling: All rollers should move freely along the track without catching or grinding. Apply a small amount of track lubricant if any resistance is felt.
- Stop positions: Verify the door stops prevent the door from traveling too far in either direction.
Common Mistakes to Avoid:
- Skipping the level check — even a 1-degree slope causes the door to drift open or closed on its own.
- Under-anchoring the track — always anchor into studs or use heavy-duty rated wall anchors.
- Ignoring molding depth — doors that catch on trim will damage both the trim and the door edge over time.
- Buying a track that’s too short — always verify the track is at least 2× the door width before purchasing.
Întrebări frecvente
What is the rough opening for a barn door?
Golul de montaj pentru o ușă de hambar este spațiul din perete, delimitat de structură, pe care îl va acoperi ușa. Ușa de hambar ar trebui să fie cu 4–6 inci mai lată decât golul de montaj (cu o suprapunere de 2–3 inci pe fiecare parte) și cu aproximativ 1 inch mai înaltă decât înălțimea golului.
What size rough opening do I need for a 36×84 barn door?
Pentru o ușă de hambar de 36 × 84 de inci, golul de montaj recomandat are aproximativ 30–32 de inci lățime și 83 de inci înălțime. Lățimea suplimentară a ușii asigură suprapunerea necesară de 2–3 inci pe fiecare parte, iar înălțimea suplimentară ține cont de spațiul de ½ inch față de podea și de jocul necesar pentru feronerie.
How much gap should there be between a barn door and the floor?
Între partea de jos a ușii de hambar și podeaua finisată trebuie să existe un spațiu de ½ inch. Acesta împiedică ușa să atingă podeaua, îi permite să culiseze lin și compensează micile denivelări ale podelei.
How much overlap does a barn door need over the opening?
Ușa de hambar ar trebui să se suprapună peste gol cu 2–3 inci pe fiecare parte — adică să fie cu 4–6 inci mai lată decât golul în total. De asemenea, ar trebui să fie cu 1 inch mai înaltă decât golul, pentru o închidere corespunzătoare în partea de sus.
How long should a barn door track be?
Șina ușii de hambar ar trebui să aibă cel puțin de două ori lățimea ușii de hambar. Astfel, când este deschisă, ușa poate glisa complet în afara golului. Pentru o ușă de 42 de inci, folosește o șină de cel puțin 84 de inci lungime.
Is there a standard rough opening size for barn doors?
Nu există un singur standard universal, deoarece ușile de hambar sunt disponibile într-o gamă largă de dimensiuni. Totuși, majoritatea furnizorilor oferă tabele de dimensiuni pentru mărimile uzuale ale ușilor. Cea mai populară dimensiune pentru ușile de hambar din locuințe este 36 de inci lățime și 84 de inci înălțime, iar golul de montaj necesar măsoară aproximativ 30–33 de inci lățime și 83 de inci înălțime.
Can I install a barn door on any wall type?
Ușile de hambar pot fi instalate pe majoritatea tipurilor de pereți, inclusiv pe gips-carton, tencuială, cărămidă și beton. Metoda de montare diferă însă. La montarea pe gips-carton, ușa trebuie ancorată în montanți sau fixată cu dibluri metalice rabatabile rezistente. Pentru zidărie sunt necesare burghie speciale și dibluri potrivite. Verifică întotdeauna dacă peretele poate susține greutatea ușii.