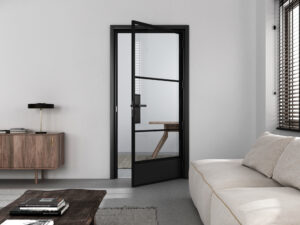
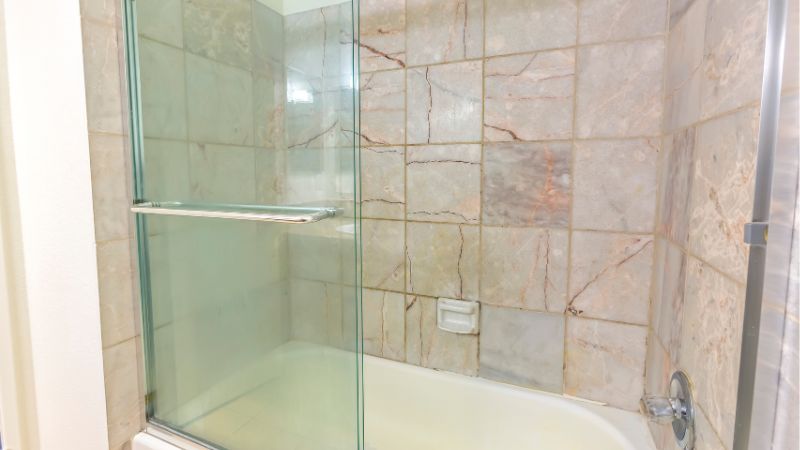
Glass shower doors are a popular type of door made of tempered glass that encloses a shower or bathtub area.
They are made of thick tempered safety glass, making them stronger and more shatterproof than regular glass. Common shower glass doors are available in three types: frameless,semi-framed, and framed.
A glass shower door is a necessary thing for your home improvement. But how to install it? Can it be a DIY project at home?
This article gives you a clear step-by-step guide to the process of installation. Read the following content to have a better understanding.
Preparing for Installation
There are several steps if you want to install shower doors. Before starting to install your glass shower door, your preparation is also quite essential.
Determine Shower Door’s Size
Take an accurate measurement of the height and width of the glass shower door. Measure the width in three different areas with measuring tape: top, middle, and bottom; record all the figures and ensure you can buy a suitable glass door for installation. Please use the smallest measurements to ensure the best fit. All measurements should be noted to the nearest 1/16 inch for precision.
Remove the Old Door and Check the Condition of Your Bathroom
If you have an old door, please carefully remove it and make sure all things are wiped out. Before your door is installed, you need to inspect it carefully and make sure there are no hair cracks or other tiny things remaining in the track gap or other areas. Any hair crack will fail the installation of the glass shower door. It is a big threat to tempered glass. In order to provide a safety door for your shower enclosure, you need to spend a few minutes checking all the areas around your shower door.
Tools and Materials Preparation
For the tools, you will typically need:
- Measuring tape
- Level
- Drill with the appropriate drill bits
- Caulk gun
- Pencil for marking drill holes
- Tape (masking or painters)
The materials you’ll gather include:
- The glass shower door kit
- Wall anchors (if not provided with the kit)
- Silicone caulk
- Any additional hardware specific to your door’s design
Make sure you have everything on this list before starting the installation. Missing tools or materials can cause frustrating delays. It’s also beneficial to have a workspace prepared to lay out your materials and organize your tools, so everything is easily accessible during installation.
Setting Up the Workspace
Before you begin the installation of your new glass shower door, it’s crucial to properly set up your workspace. This will ensure the safety of your bathroom area, and that the installation can proceed smoothly, especially in small spaces where maneuverability is limited.
Protecting the Bathroom Area
First and foremost, safeguard your bathroom tiles and fixtures. Use heavy-duty drop cloths or old blankets to cover the floor and bathtub to prevent any scratches or damage during the installation process.
- Tile: Place a thick cloth or cardboard over the tile to avoid chips or cracks.
- Use painter’s tape to secure the protective materials in place and prevent slipping.
Ensuring Level Surfaces
Ensuring that your work area is level is paramount for a successful shower door installation. An uneven surface can lead to improper door alignment, resulting in gaps or improper sealing.
- Check Level: With a spirit level, verify the levelness of the shower base and walls. Pay special attention if you’re working in an older home where surfaces might have shifted over time.
- For Small Spaces: As these can particularly amplify any deviations from level, consider using a smaller level to navigate the confined area more easily.
During Your Installation

Install Bottom Track
For a sliding shower door, the bottom track is an indispensable part. You need to cut the bottom track to the measured width using a hacksaw, leaving a 1/8″ gap for expansion. File the cut ends smoothly.
To secure it, apply a drop of silicone sealant to the underside of the track. Place the track over the shower base threshold. You can use tape to level the bottom track temporarily.
Mark the location of the door frame
On the side of the shower opening that supports the door, position the door frame against the wall so that its lower end fits into the base track. Without moving the track, use a level to adjust the door frame position until it is plumb.
Mark with a pencil in each place you need to drill a hole.
Drilling Holes for Wall Anchors
Drill holes at each mark using a 3/16-inch diameter masonry drill bit. If it is the first time you install a shower door, you can drill pilot holes to help you find the correct place.
Knock plastic wall anchors into each screw hole. Use a plastic hammer to avoid damaging the wall.
Place the jamb against the wall so that its screw holes line up with the plastic anchors. Screw 1.5-inch stainless steel pan-head screws into each hole.
Installing the Jamb and Door Panels
Installing a glass shower door can transform your bathroom, but precision is key. For frameless doors, ensure proper alignment to maintain the sleek look and safe function.
Securing the Shower Door Frame
First, position the frame of your shower door onto the tub or shower base where it will be installed. If you’re working with a frameless shower door, you will directly secure the hinges to the wall instead of a frame.
- Screw Placement: Mark the locations for the screws on the wall by holding the frame or hinge in place. A leveling tool can help ensure everything is straight.
- Drilling: Apply masking tape on the tile to increase drill bit traction. Then, using the appropriate drill bit size—consider the screw diameter—carefully drill holes at the marked spots.
For framed doors, after drilling, align the frame again and affix it using screws. For frameless doors, attach the hinges directly to the wall at the drill points, ensuring they are firmly in place.
Mounting the Glass Panels
With the frame or hinges secured, it’s time to mount the glass panels.
- Lifting Panels: Carefully lift the door panel and position it within the frame or align it with the installed hinges. If necessary, have someone assist you to avoid damaging the glass.
- Securing Panels: Once aligned, use the necessary fasteners to secure the door to the frame or the hinges for a frameless door.
Ensure the door panel is perfectly level before fully tightening the screws. For a frameless shower door, ensure that the door is correctly aligned with the hinges before securing it. Double-check the stability of the door panels after installation to verify there are no movements or wobbles.
Sealing and Finishing Touches
After successfully installing your glass shower door, it’s crucial to ensure a watertight seal to prevent any water leakage that can cause damage over time. This section will guide you through applying caulk and sealant, as well as attaching handles and other accessories to complete your shower door installation.
Applying Caulk and Sealant
Your first step is to apply a bead of silicone caulk along the edges where the glass meets the wall and the shower base. You’ll need a caulk gun for this. Cut the tip of the caulk tube at a 45-degree angle for a smoother application, and make sure that you fill all the gaps thoroughly for effective waterproofing.
- Clean the area where you will apply the caulk, ensuring it’s dry and free of debris.
- Hold the caulk gun at a 45-degree angle and apply steady pressure to the trigger.
- Run a continuous bead of caulk along the joint, moving smoothly and evenly.
- Use a caulking tool or your finger (wet it slightly) to smooth the bead of the caulk.
- Allow the caulk to dry as per the manufacturer’s instructions before using the shower.
Attaching Handles and Accessories
Installing the handle and any additional accessories is the final step. The placement should be measured precisely, taking care not to drill through the glass.
- Measure the location of the handle and mark it clearly on both sides of the glass.
- Follow the manufacturer’s instructions for the specific hardware you have, which may include rubber gaskets or specific mounting equipment.
- Use a screwdriver to secure the handle, ensuring that it does not overtighten and risk damaging the glass.
Throughout this process, remember that while it’s important to secure everything firmly, you must also be gentle to avoid stressing the glass. Once completed, you can step back and admire your beautifully installed glass shower door, which is now sealed correctly to keep water where it belongs.
Quality Check and Maintenance

After your glass shower door is installed, it’s important to conduct quality checks and maintain it for a long-lasting, pristine look. A flawless frameless shower glass can be the highlight of fine homebuilding, enhancing both aesthetics and functionality in your bathroom.
Quality Check
- Inspect the Frame: Even if you’ve chosen a frameless design, examine any hardware or mounting points for secure attachment.
- Look for Gaps: Ensure there is no gap between the door and the sealing strips to prevent water leaks.
- Check the Glass: Confirm there are no scratches or cracks. Any imperfection could affect the integrity of the glass.
Maintenance Tips
- Regular Cleaning:
- Use a squeegee after each shower to avoid water spots and mineral buildup.
- Clean the glass with a mild detergent and a non-abrasive cloth to keep the door sparkling.
- Ventilation:
- After use, leave the door open to promote air circulation and prevent mold growth.
- Professional Checks:
- Once a year, consider hiring a waterproofing contractor or an oasis shower doors specialist for a thorough inspection.
- Hardware and Sealant Inspection:
- Check hinges, handles, and sealants bi-annually for any wear and opt for professional repair if needed.
By committing to regular care, your bath enclosure installation continues to add value and beauty to your home. Remember, small efforts can prolong your glass door’s life and maintain its beauty for years to come.